Wednesday, November 28, 2012

Coupons are good!

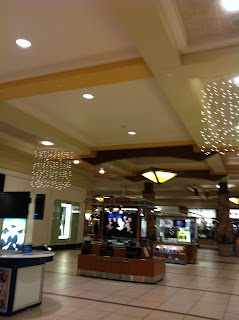
     Well if any one knows the type of person I am I am all about coupons!  The best coupons are those that say free on them!!  Well I was looking through some of my coupons came across one that said FREE on it and even better it was for a little place called Victoria Secrets. So can you tell me why in the world so many people pay mega bucks for Victoria secrets panties?  Well... OK, I have but since I have been on their email-list and have their Ap on my phone and receive text messages I get all my panties for free all my bras $10.00 bucks off and can spend my money on awesome things like shirts and yoga pants and this awesome hand lotion I bought (that lotion was a featured in my birthday haul video).  So to the point!!! As if I don't already have so much on my hands , I cam e across this coupon my daughter and I both had one so whats better than getting your own underwear for free but getting them for your kids too! One less pair I have to buy my teenager, ha ha!  So lets just say I made time to go get these coupons redeemed. So a super fast run to the mall it was.  Left the boys with Uncle and jetted to the mall.
I am not all about showing my underwear on camera of any kind so lets just say we both redeemed our coupons for $12.50 panties and moved on to the new PINK merch.  There was of course one shirt I couldn't  say no to.  I also looked for some more hand lotion, it is way to popular and smells way to good to be found.  I also made a wish list on what I was hoping to get next time :).  The women at the register made our nights and gave Arianna and I both PINK puppies metallic green with black polka dots .

So we walked away happy!  and come to find out it was the last day of Secret Rewards ( mystery gift card )  So now I have 3 its like the lottery :)  one of them has to be $500.00 bucks....right?
So that was my "after cheer leading practice pick up adventure" with Arianna because all adventures should be shared with your best-est daughter!


Have you seen my last video you have to see it a special Christmas DIY,  FUN FUN!Christmas Tree DIY

Sunday, November 25, 2012

How to make a Table Center piece for Christmas

     Yay the Christmas season is here!  We had a great Thanksgiving,  had super full bellies now bring on the Christmas Decorating.  I have enjoyed Christmas lights and Christmas decorations for as long as I can remember.  I can remember my mom and dad taking me for drives after Christmas gathering to see as many decorated homes as possible. Now my husband and I take our kids to oooh and ahhh over neighborhood decorations and lights.
   I had the whole weekend off without any work to do so I made huge plans to decorate.  So I went out and bought a new tree (fake).  A bit smaller for more room in our living room.  No new decorations this year, bought a bunch on clearance ant the end of last years season. Well I was looking for a center piece for our table preferably a tree. Although all I found was a pre-lit small tree.  It would have been a waste cause I have no plug on my table so I went to thinking.  Came up with an idea, ran to the craft section and grabbed a green foam cone.

     You want to see what I came up with??
Isn't it cute??  So this is what I did.... I took Christmas balls of all sizes ,a foam cone, a glue gun and lots of glue sticks.  I would have to say i had about 40 Christmas balls I took some cute cone looking ones for top and bottom row and round ones for the rest of the tree.  Starting off cone like shaped ornament then with the smallest balls only about 1 inch round balls, I took all the hanging caps off then impressed the top in the foam them filled the hole with glue then placed the ornament.  I did the same thing with all the ornaments working around the cone with the sizes of your ornaments getting larger and you work your way around till you get to the bottom and most of the foam is covered. If you have areas of foam that are still exposed just load a small ornament with clue and place it in those areas.  Until no more foam is showing this will require about 10 more small Christmas balls.  Once all my foam is covered I glued a star on the top and felt it needed one more little touch so I added a glitter bow ornament.  
Hope you try this, my kids love is and it adds to my kitchen decor.  If reading the instructions is not enough and I may have missed a step check out the Video Tutorial .  Leave feed back and feel free to ask any questions.
Enjoy your Holiday Decorating and most important enjoy your family and friends.


Tuesday, November 13, 2012

Dollar Store find goes from not so great to SUPER CUTE!

     I have been waiting to post this totally great idea I had!  So I grabbed the idea and ran with it and it became reality.  So I was browsing through a new little shop in our small little town, it is a little local dollar store and you know me and my love for dollar stores.  So I stopped by a new little juice and sandwich spot! Grabbed some berry berry juice yum, yum!  They had the norm, ya know balloons, cooking utensils, cookies and on and on.  I wandered over to the jewelry section didn't see much I liked till I found these clip on ear rings in ugly gold (not a fan of gold).  I looked at them a bit longer and thought that I could work with this particular style so I bought them and brought them home.  These are what I ended up with....
these gold clip on ear rings! Don't pay any attention to the price they were a buck.  Ya know they are not to bad.  I decided to take some nice black nail polish and take the gold away.

 I did like the look of one coat but you can still see the gold so I did stick on two coats and this nail polish also dried fast.  Oh an I did purchase it at the dollar store I bought the ear rings from.  It is a skinny brush decorating polish yeah double duty!!

 Looks pretty good, but I can not ever leave well enough alone.  On pinterest I had seen how you can paint rhinestones with polish to make them pop.  Since I re-pinned that post I have been searching for rhinestone jewelry so I can paint, here is my chance. I pulled out great colors that went with black and dabbled on the popping color :).

Here a few clips of how they looked through out the steps and also a before and after.  They still remain as clip on ear rings but I am going to change the backs on them to fit my ears.  If I had normal pierced ears I would glue on regular ear ring stud backs on them with industrial glue but I do have gauged ears so I will take a pair of gauged plugs and glue them on the backs but until then I will wear them as is and they work!!
 Looking goo on my ears!!  Yay another dollar store find made even better with only a few bucks, I have to say I am liking them, yay!
 Tell me what you think leave me some feed back let me know what you think of my dollar store idea!

Sunday, November 11, 2012

Check out my YouTube Channel

     Good evening my friends, just had a jam packed day full of video making.  Had to get some videos put together for family.  So they can all feel like they were with us while we were trick or treating and celebrating a few birthdays. I think I am caught up on the videos until the next big event.

     Speaking of videos all of you should know that I have a YouTube channel.  Find my channel here is my link Mariah's Sassy Fahsions on YouTube. There are lots of fun things to learn.  A new video should be up tonight.  The video blog (vlog) is full of fun shopping hauls and also DIY projects and a couple makeup tutorials.

     I have just finished a good jog and now it is time for a good shower so until next time.

                                                             DIY glitter polish tutorial

                                                       Don't be afraid check it out!!!!

Thursday, November 8, 2012

It has been so long!! DIY caviar manicure.

Oh my it has been a while I have been so busy with all kinds of stuff with the kids and lots of orders on Etsy. I also have a couple of videos on YouTube!!!
http://www.youtube.com/watch?v=d7iJr99NSnY&feature=plcp

http://www.youtube.com/watch?v=3Gz2Sk1mdPA&feature=relmfu

http://www.youtube.com/watch?v=_PlOnzb4J6Y&feature=plcp


  Any way I am here to show you, my new manicure and how I did it.  So everyone has heard of the new trend in caviar manicures??  They are so cute! My daughter and I were shopping for her 15th birthday and we stopped by SEPHORA and I was able to see the product first hand and the colors were great!! Like amazing!


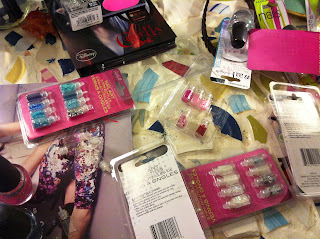
As much as I loved the product I just can not spend the cash on it.  Unless I saved and splurged or it was a gift!  If you watch my DIY glitter polish video I showed the little bottles of glitter I purchased at the Dollar Store ( a buck is more my speed ha ha ).  So on top of glitter of all shapes and sizes I also purchased some mini beads same beads used in the Caviar manicure.

So I have not ever done a caviar manicure befre so I decided to only do one focal nail and they others a nude color with a gold leopard print.  first thing is my finger nail polish.  So I dug into my giant basket of polish to get my colors and my base coat and top coat.
I am missing my gold leopard color and I am not sure why I did that? Any way it was a gold color you will get to see in a bit lets start with the Caviar portion.
** Step one.... coat all fingers in bas coat in my case it was a nude color by e.l.f.
(oh and don't forget to put a layer of vitamins and a base coat that should be step -1)
*** Step two... a second coat...but on your ring finger, or any fingers you choose to caviar let it get not dry but tacky .
 Then pour on the mini beads and once covered just gently push with the pad of your finger. I let it sit for a couple minutes and put a top coat on and gently wiped off what was on the top of the beads just with my finger. I didn't wipe hard enough to wipe what stayed between the bead cracks just to take off the sheen left on the tops.

I love it and I think it turned out great it has the solid nude color coming through the cracks. After my beaded nail dried I started to make they other nails shine!! I used a nail tool and gold polish to make random leopard spots on all my other finger nails.  
*** step one.... make crescent moon shapes they can be totally random not neat at all.
Hope you can see it!!

Then just do the same randomly over the rest of your nails make random one sided dots and just random spots and it should work out great!
Let it dry and put an amazing top coat on your nail like "out the door" found at Sally Beauty supply with some glitter in it. 
My nails lasted a week in a half the caviar slowly came off bead by bead but it never looked bad.  I finally chipped the rest off and took the polish off with polish remover.  Now a week in a half for a home done manicure is pretty good.  


Hope you enjoyed this DIY project and if you would rather see a video on this DIY I would be glad to post one on my YouTube channel.  Please leave feed back and subscribe to see more of what I got!!

Friday, October 5, 2012

While I have been away!

Wow, what busy times and its not even Christmas yet!
I have not been able to blog due to, crazy work schedule. Not only for the restaurant but for my business (Mariah's Sassy Fashions). I was able to haves booth at the Apple and Pork Festival in Clinton Illinois. It was a blast! I was able to display all my designs and accessories ,sell a few things, make a couple extra bucks :). Also was able to do a few feather extensions and color hair extensions.so all in all it was a great time. Now I will end this super short blog post with a few pictures of what I ha for sale in my booth.
Comment below, leave me some feed back love to hear what every one thinks.
Have a great weekend all!

Friday, September 21, 2012

Mobile blog alert! Can you say Target and clearance in the same sentence?

Alright, so it's been a while. This restaurant marketing has me running around like crazy. Any, who... No time for blogging but just enough time to check out some great sales at Target. Not just sales but I purchased 4 things all were under 10 bucks!!!!! Let's see if you can guess which one was full price!!
Now how cute is the scarf, although it is technically a summer style for 4 bucks it was a steal to match up with a black and white outfit....love this scarf. There were a few others but hey I can't spend all my money, hehe!
Watch Heaven!!!! So many cute watches I couldn't even decide. Well the pink one was for my daughter, do that one is not technically mine but the color is amazing. I am sure I will get my turn to show it off with an out fit or two in its life time. Now the black one just like the pink and that's mine all mine. The pink and black were a steal at 6 bucks each both clearance items. Now last but not least my favorite the men's inspired throw back with a touch of turquoise....cute! Alright now this scrumptious watch was the only item I payed full price and get this only $10 bucks!
Well hope if you are lingering for a mini shopping spree or shopping for gifts (Christmas right around the corner). Take a brief look at the clearance and save a penny or two ;)

Saturday, September 15, 2012

Mobile Blog Time! Happy Birthday Tiffany & Co

Wow what a busy week! While I was so busy Tiffany & Co. were celebrating their 175th birthday. How awesome! A fun fact ( thank you hood morning america) about Tiffany & Co. is they began their business as a stationary company.....wow did that get stepped up!
Any who, because I love Tiffany & Co. And their beautiful signature blue color I ventured into my fingernail polish bin to find the color of gorgeous. Well out of the hundred of polishes none were even close. Bummer :(
Although I am a fan of chemistry especially color chemistry I am know for creating my own mineral makeup pallet and some glamorous lip tints so "I got this".
Here is a brake down of what colors I used and how I mixed it and what I put it all in.
So I pretty much eyeballed everything more light colors of course, I counted everything in seconds and I used fast dry clear coat as a filler and I am very happy with the out come. Tell me what you think.
.... I am going to have to apologize how my mobile blog lays put my photos hope it makes sense :)

Tuesday, September 11, 2012

Mobile blog alert!!! It's almost Halloween....

I was just in one of our local Goodwill stores and oh my goodness, Halloween Central. I talked about the dollar store and now I guess it's time to talk a bit about our second hand stores. Not only can you find super deals the money goes to good causes.
So I snapped a few pics of how much great Halloween gear they had. You name it wedding dresses, colored rights, fake mustaches, decorations, cowboy hats and on and on.

My mini Dollar Tree splurge


   So I will be honest and say that I could not wait to post again on "My Blog", hehe! Yes still a little giddy about having my blog and posting new blogs. Before I get started on my mini Dollar Tree splurge I just want to give a shout out to all teachers and those of you who are retired.  We are celebrating teachers and school faculty at work this week put together a little appreciation celebration. So here is a little shout our to those important people in our community so take the time and say thanks to these special people.

     Not sure how many people out there know about this dandy little store called "Dollar Tree".  Let me tell you it is so much fun!  If anyone is a fan of Pintrest there are many blogs on what to and what not to buy at the dollar tree Things to buy at the dollar store, so check it out.
    I personally love the Dollar Tree I go there and purchase many things.  I do get snacks for my kids lunch and I buy storage containers oh and I can go on and on.  If you are a budget queen or king and love to get a bang for your buck I really suggest you check it out! Enough of me repeating my self let me get to the items I brought home in my bag from this trip.
Yup everything just a buck, ( plus tax)
First on the list Duct tape, but not just any duct tape but animal print duct tape.  If anyone has checked out my Etsy page you all know my love for duct tape.  Now I do admit that there is not much on the roll, but enough to make a little wallet or cover your cell phone stripe out your note book for school and much much more in little projects duct tape is amazing.
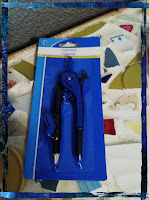
A compass,its not just for math class. This is great for pattern making, and just getting that perfect circle and round edge when ever you need it and for a buck its a steal!
POP UP TAPE!  WOW just a buck!  so if you have bought this in a conventional store you will know that the price alone is enough to snag this at the dollar tree.  It is so easy to use especially giving your self a perfect french manicure it is just tacky enough and easy enough to make nail art fun and easy.

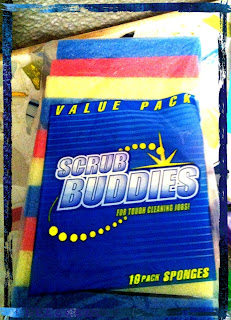
Last but not least "Scrub Buddies", not for scrubbing though.  These are much to weak for scrubbing  I do admit and I hear that sponges hold bacteria so I find other fun things to do with them.  I do like these for crafting because they have small finer holes.  So my plans are to make sponge painting sponges.  Make them for the kids make them for t-shirt painting.  I think I want to cut them up into geometric shapes and make a couple of t shirts with a tribal design ( all the rage).
Hope this give everyone an insite on how to think out of the box when at the Dollar Tree, or at any store for that matter.  Give me your feed back and let me know how I am doing.... let me know what you want to know what you want to see give me your feed back.  Of course everyone needs to know I do not work for dollar tree I am only giving you all my ideas and my opinions on their products.  Thanks for sticking around and reading about my ideas.  Enjoy your day and Thanks a teacher!!