http://www.youtube.com/watch?v=d7iJr99NSnY&feature=plcp
http://www.youtube.com/watch?v=3Gz2Sk1mdPA&feature=relmfu
http://www.youtube.com/watch?v=_PlOnzb4J6Y&feature=plcp
Any way I am here to show you, my new manicure and how I did it. So everyone has heard of the new trend in caviar manicures?? They are so cute! My daughter and I were shopping for her 15th birthday and we stopped by SEPHORA and I was able to see the product first hand and the colors were great!! Like amazing!
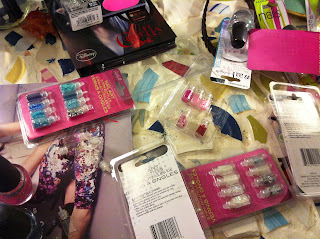
As much as I loved the product I just can not spend the cash on it. Unless I saved and splurged or it was a gift! If you watch my DIY glitter polish video I showed the little bottles of glitter I purchased at the Dollar Store ( a buck is more my speed ha ha ). So on top of glitter of all shapes and sizes I also purchased some mini beads same beads used in the Caviar manicure.
 So I have not ever done a caviar manicure befre so I decided to only do one focal nail and they others a nude color with a gold leopard print. first thing is my finger nail polish. So I dug into my giant basket of polish to get my colors and my base coat and top coat.
 I am missing my gold leopard color and I am not sure why I did that? Any way it was a gold color you will get to see in a bit lets start with the Caviar portion.
** Step one.... coat all fingers in bas coat in my case it was a nude color by e.l.f.
(oh and don't forget to put a layer of vitamins and a base coat that should be step -1)
*** Step two... a second coat...but on your ring finger, or any fingers you choose to caviar let it get not dry but tacky .
Then pour on the mini beads and once covered just gently push with the pad of your finger. I let it sit for a couple minutes and put a top coat on and gently wiped off what was on the top of the beads just with my finger. I didn't wipe hard enough to wipe what stayed between the bead cracks just to take off the sheen left on the tops. I love it and I think it turned out great it has the solid nude color coming through the cracks. After my beaded nail dried I started to make they other nails shine!! I used a nail tool and gold polish to make random leopard spots on all my other finger nails.
*** step one.... make crescent moon shapes they can be totally random not neat at all.
Hope you can see it!!
Then just do the same randomly over the rest of your nails make random one sided dots and just random spots and it should work out great!
Let it dry and put an amazing top coat on your nail like "out the door" found at Sally Beauty supply with some glitter in it.
My nails lasted a week in a half the caviar slowly came off bead by bead but it never looked bad. I finally chipped the rest off and took the polish off with polish remover. Now a week in a half for a home done manicure is pretty good.
Hope you enjoyed this DIY project and if you would rather see a video on this DIY I would be glad to post one on my YouTube channel. Please leave feed back and subscribe to see more of what I got!!


No comments:
Post a Comment